Network CD Writing


|
2.8.2 Network CD Writing |
joerghaeger.de:80 |

|
CDWserver
webCDcreator
rcdrecord
WWW
|
User manual for webCDcreator
1. IntroductionwebCDcreator offers users the
possibility to copy files from their computer to a PC with a CD-burner
which is connected to the network. The user compiles the contents of
the CD by using the webCDcreator,
which then creates the CD. The webCDcreator
allows multiple users in the network to make use of the CD-burner. 1.1 First start of the webCDcreator Java programThe first time webCDcreator is started on the computer, the user will be asked if the program can have unlimited access to the computer's resources. This has everything to do with the philosophy of Java, where program code (that can have been downloaded from the internet through the browser) cannot be executed without the user's explicit permission.Click the [ Details ] if you want to read more about the certificate by which the creator of webCDcreator has digitally signed the software package. Click on [ Start ] if you consider the program to be safe and want to start using it. 
1.2 Initial use of webCDcreatorThe first time a workstation connects to the CDWserver, the workstation and/or browser has to be configured to work with the webCDcreator. To achieve this, click the link "Start Page" in the left pane of the main page. Make a choice concerning the Java support that best fits the working environment. Some people might prefer the use of the "Java Plugin", by which the webCDcreator application appears within a browser window.Others may prefer the "Java Web Start". In this case, the webCDcreator application will work independently from the browser, and can even be started without a browser if so required. Users with a slow link to the webCDcreator server may prefer the latter option. After this one-time configuration (which is clearly documented), the webCDcreator application can be started. 2. Setting up a connection to the serverAfter starting the webCDcreator application, the main screen will appear. At that moment, a connection request is made from the program to the server. If this request is granted, a dialog-popup will appear with information regarding the version of the program. If so required, other local information can be included in this popup (like service messages from the system administrator). If the request is not granted, an error-popup will be shown, and the program will close itself. If this happens, it is recommended to wait a short while before attempting again. If waiting does not solve the problem, the system administrator should be notified. 2.1 User profiles on the serverIn case of a default installation, everybody can use the server's functionality across the network without limitation. The system administrator can however decide to block "anonymous" access. Users will then require a login account on the webCDcreator before the application can be used. If the system administrator did indeed make this decision, a login dialog popup will appear after the initial welcome popup. Users already having an account on the webCDcreator can enter their
username and password here. Others will have to press [ New... ] in order to choose
a unique username. Furthermore, the user is required to enter a valid email address, as the server
will send a randomly generated password to that address. After
receiving the email, users can login using the chosen username and
provided password. It can take a short while (usually no more than
several minutes) before the password is sent. It is strongly
recommended to change the password as soon as possible. To do
this, select the pulldown menu Settings
-> Password. After a successful login, the webCDcreator is ready for use.
3. Choice of the CD-typeWebCDCreator is able to create different types of CDs and DVDs:
3.1 "Add Files or Folders to a Data CD"Choose this option if the files on the local harddisk are organized in a directory structure, and this structure has to be copied to the CD. 3.2 "Write an "ISO 9660 Image"-file"Use this option when a CD-image file is already available. This ISO image (which usually has .iso as a file extension) must be burnt onto a CD in a special manner in order to preserve the characteristics of the original CD, and to be able to correctly read the actual contents as it was present on the original CD. Example: Bootable CDs are often electronically distributed as ISO files. 3.3 "Burn an audio CD"With this option, a user can burn wave files (.wav), MP3 files (.mp3) or OGG files (.ogg) onto the CD in audio format, so normal CD-players (home, car, computer) can play these CD's. Note: WAV files only with a 44.1kHz - 16 bit format can be used. The system administrator can decide to disable this functionality. 3.4 "Copy a non-'copyprotected' CD"Use this option to create a 1:1 copy of a source CD. For this to work, a second CD-drive (usually a CD-ROM) has to be mounted as well. 
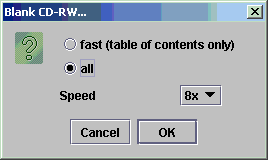
3.5 "Erase a CD-RW or DVD+RW"Use this option to erase a rewritable media (CD-RW or DVD+RW). There are two ways to do this: the fast way (only the TOC - table of contents is erased) or the thorough way (the complete contents is erased). The fast way usually takes no longer than a few minutes. 4. Compiling the CDThe main screen is devided in two panes. The left
pane shows the available resources (local drives, network drives,
removable media). From there, the sourcefiles can be selected which
have to be burned onto the CD. The right pane shows the actual status
of the directory listing of the CD that is being compiled by the user, which is
intended to be written to the CD. Above the right pane, the format of the
destination CD/DVD can be chosen from a pull-down menu. At the bottom
of the right pane, a status bar gives realtime information about the
amount of used and available space on the CD. A red bar indicates the
amount of data that does not fit onto the CD. In the case of audio
CDs, it will indicate the number of minutes (playtime). In case of
data CDs, it will show the amount of megabytes. The directory-listing is initially empty, but can be filled in the following manners: 4.1 Create a new directory
4.2 Add file/directory
4.3 Remove file/directory
4.4 Rename file/directory
4.5 Audio CDs
5. Burn the CDAfter the selection has been created the CD can be written.
Important: insert the CD-R after it is requested by the program. 5.1 Explanation of optionsThe options you choose for the CD can have a big effect on the useability of your CD. 5.1.1 Filesystem optionsThe volume ID is the name of the CD you will see, for example, in Windows Explorer. For data CDs, webCDcreator will make a standard ISO data CD with the Microsoft Joliet and Unix Rockridge extensions. These extensions allow the use of long file names on CDs for Microsoft and Windows systems respectively.
5.1.2 Writing optionsHere you can set the speed at which the CD will be written. Please ensure that the CD you are writing to supports the speed you choose. You can choose to simulate the write operation, in which case the writer will do everything normal, except with the laser off. This still requires that a writeable CD (preferably the one you are going to write on) be inserted. 5.1.3 Other optionsHere you can set a few other options for writing the CD:
5.2 The burning process
|